Lawn Makeover
Project Date
July 15th, 2021

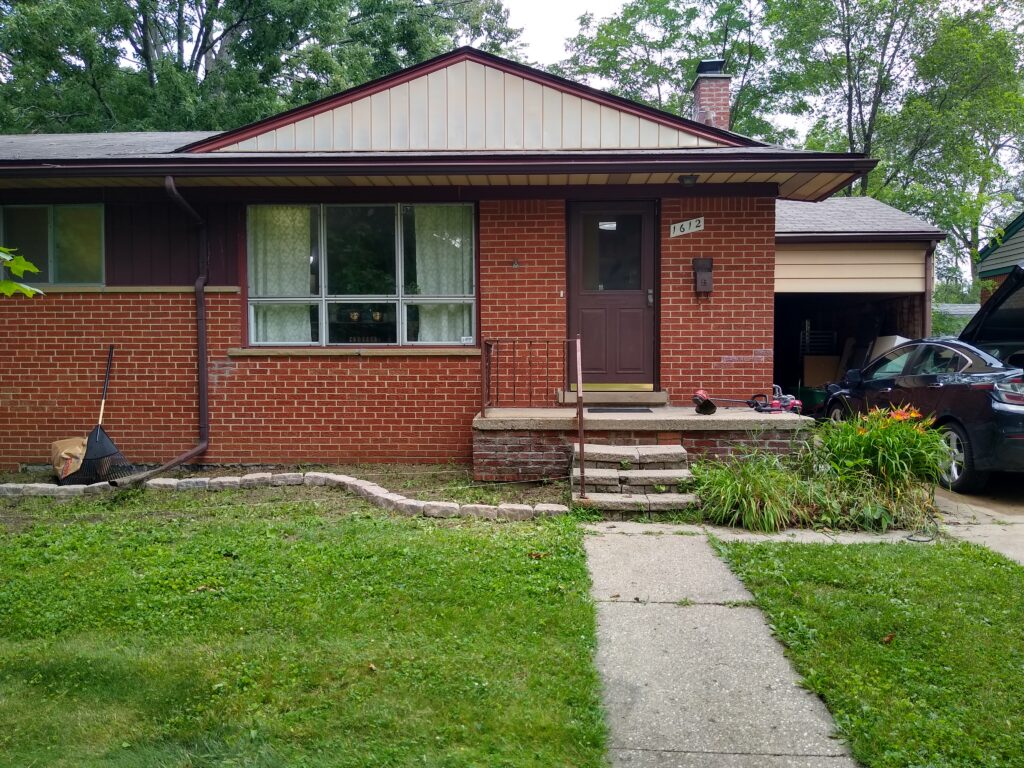
We’ve been in our house for about 11 years, and last fall we decided we needed to put some serious work into the front of out house. The bushes were large and overgrown, to the point where simply trimming them wasn’t cutting it anymore. We’re debating selling or renting our house, and the curb appeal is non-existent. Plus, I started realizing that it was affecting how I feel when I get home. I was feeling like a delinquent homeowner, and decided I needed to start learning about landscaping – at least enough to make my house less of an eye-sore.
Whether we stay in the house or not, something had to be done. And I was taking it upon myself to figure out what.
Last Fall
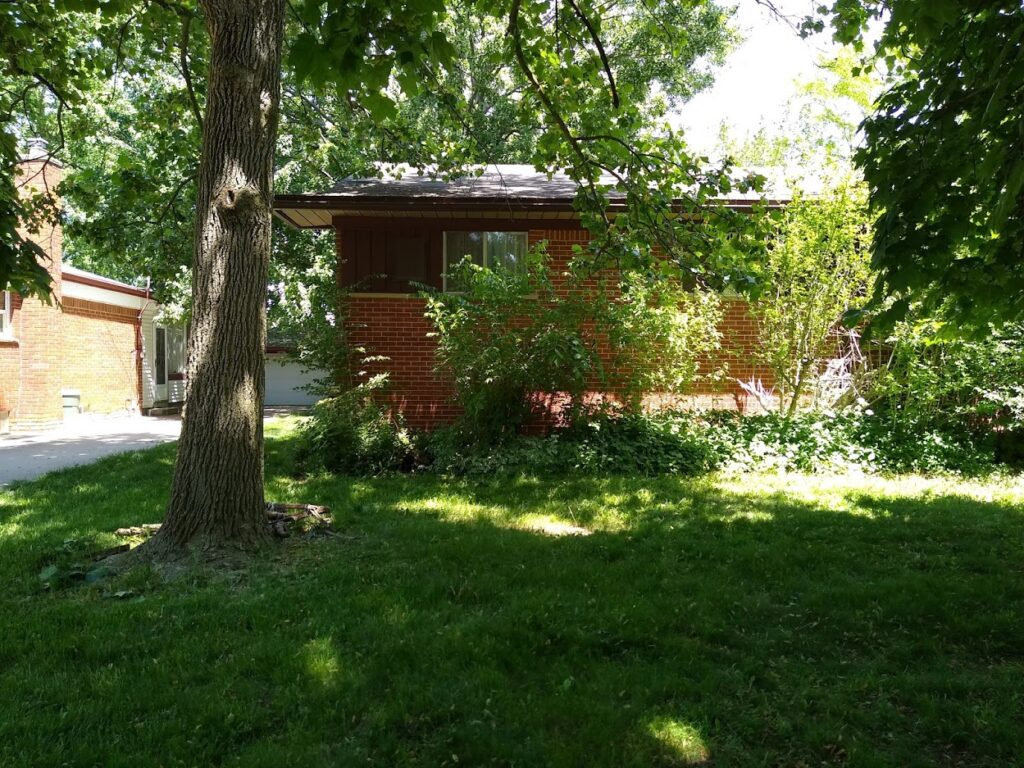
We hired a guy to come and remove the existing bushes. They’re huge, they hide the house, we can’t see out of the windows, and they’re too hard to weed under. We got to the point where we decided anything would look better.
Day 1 - Weeding and Roughing
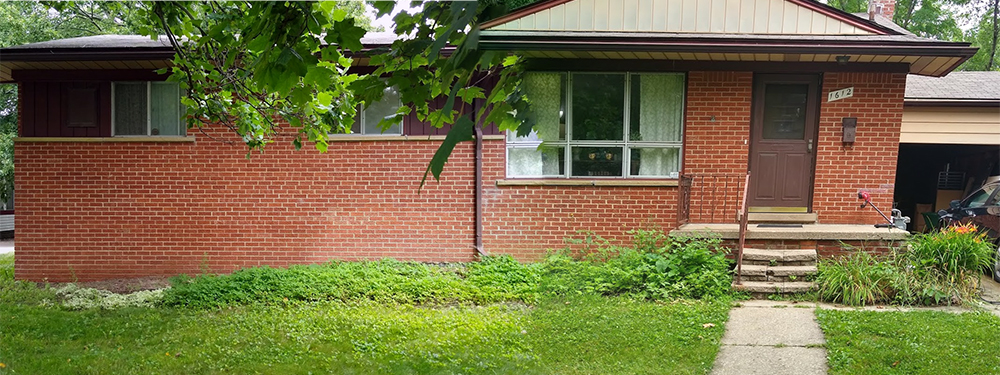
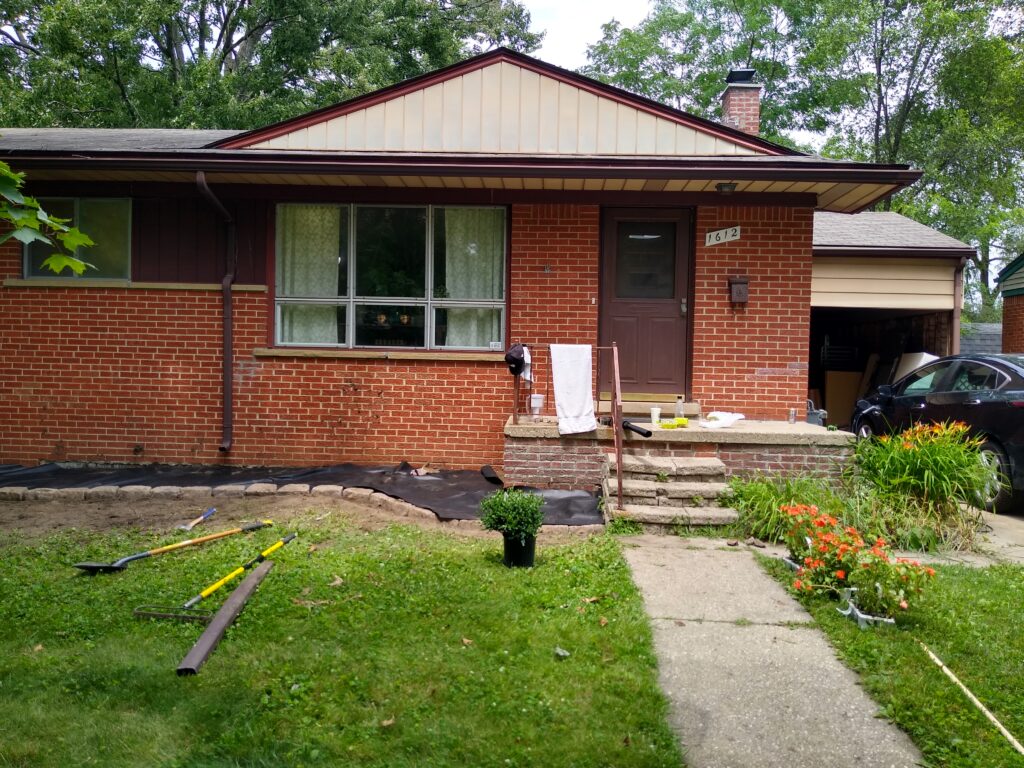
So, here’s my front yard this summer. With the bushes taken out, weeds are spreading all over the place. I cleared it a few times, but clearly it was going to be a problem until I moved forward. The goal is to put some sort of hard barrier in, fill it with some small shrubs or flowers to accentuate (but not hide) the house. Clearly, there’s still a lot of work ahead of me.
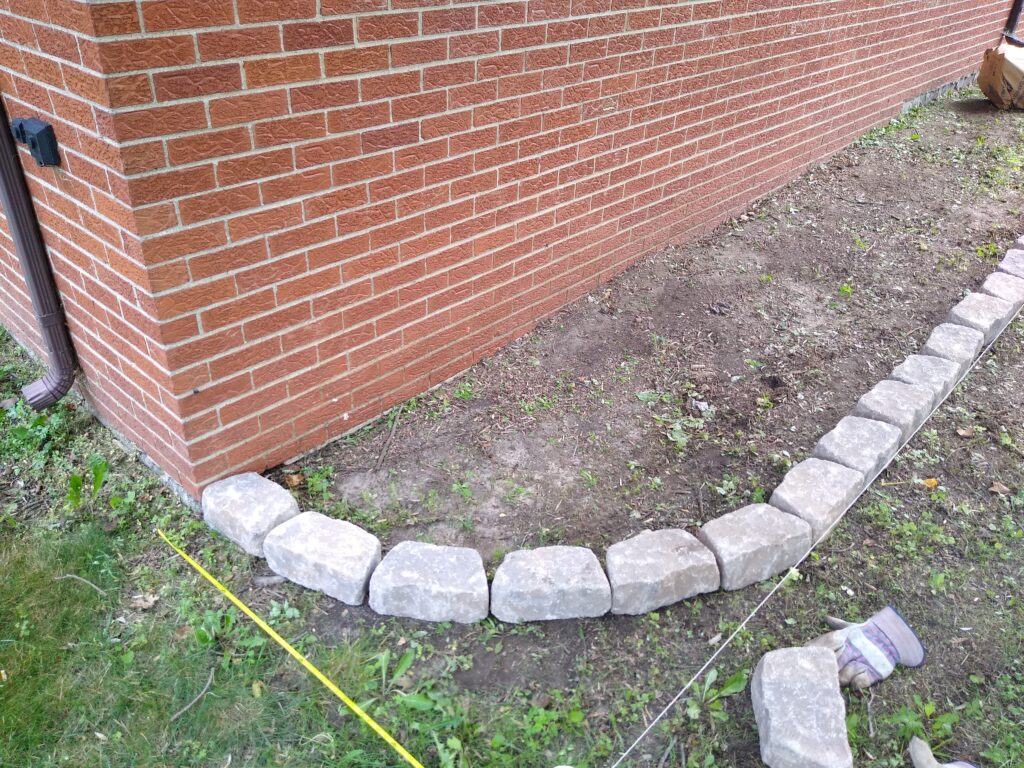
First, I weed-wacked everything out of the area. There isn’t much grass, and I’m planning to re-seed later anyways, so I just went to town and removed everything. I laid out some lines in string, and started roughing the stones to see if I had enough, and to get a rough feel for the shape. Looks like a good start!
Day 2 - Re-Grading and Burying Stones


I cleared all the stones from the middle part, where most of the dirt management needed to be done. I spent some time re-grading the dirt here. My house is on a slight hill, and is slightly lower on the left side. Removing the large bushes really messed with the terrain here, and the dripline from these large plants moved dirt all of the place. So I flattened out the line, and began burying stones. This process took the entire day (in the 90° heat…), but the end result looked much more even than what I had beforehand.
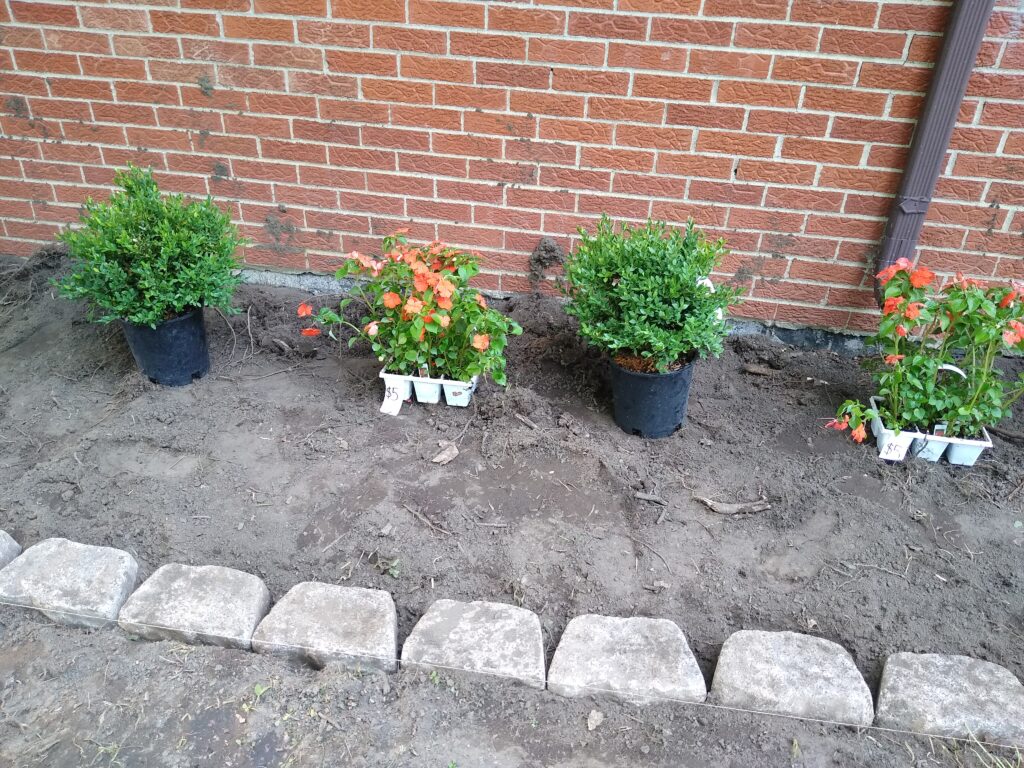
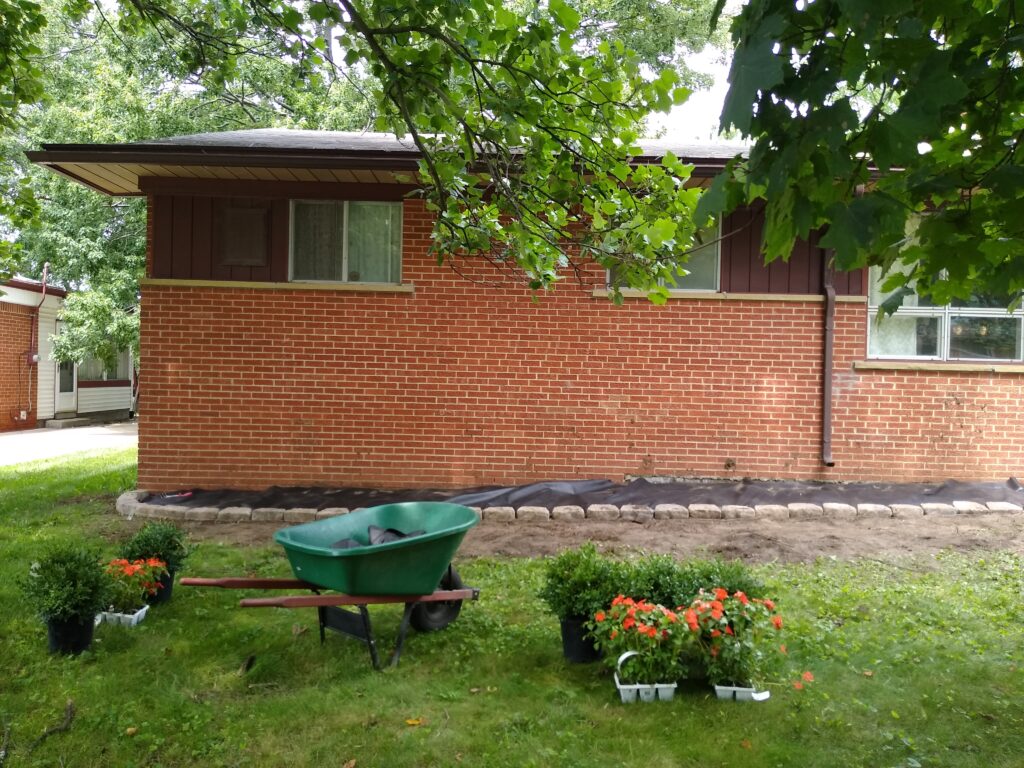
Later that evening we picked out some plants. We decided on 1.5′ boxwoods, which will grow to about 3′ in diameter when they’re fully grown. Spacing them 5′ apart, this gives us room for some flowers between them. Brenda picked out some easy annuals for now, since we’re not sure if we’re renting or selling the house. This lets it look pretty now, and either the new owners can personalize it next spring, or we can decide to sink more money into an active rental ourselves.
Day 3 - Final Grading, Weed Blocker, Dry Run
Business time. I recruited my brother, Josh, to come help push some dirt around. And I’m glad I did, because man… everything needed to be reworked.
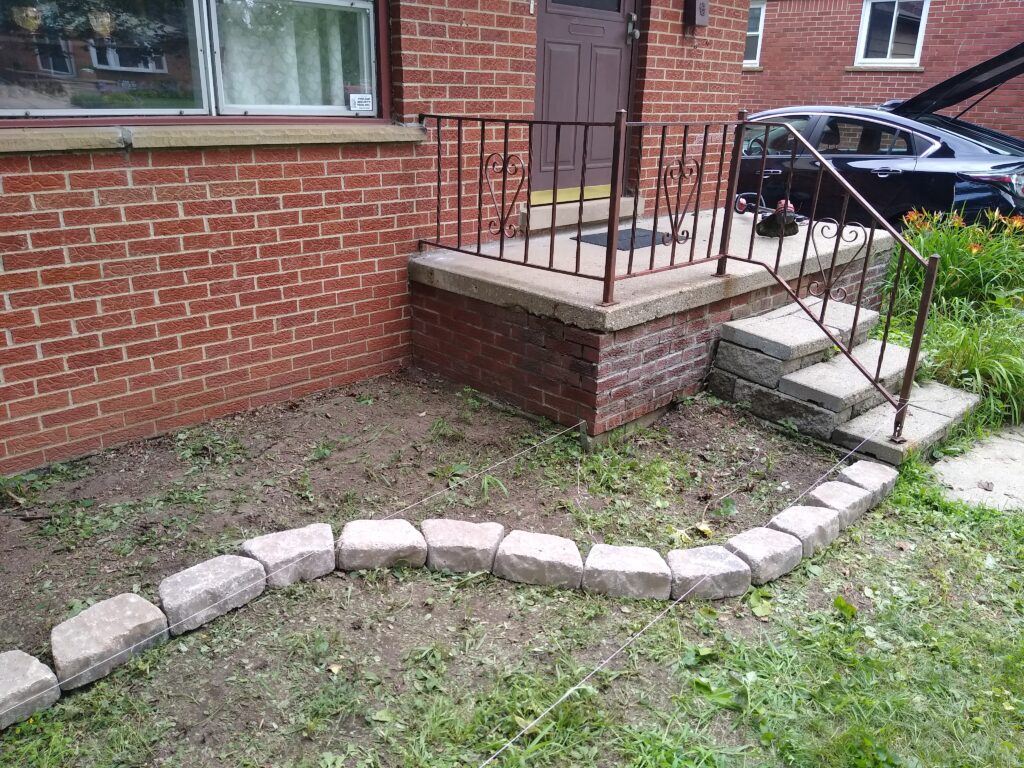
Having recently set a bunch of stones, Josh reminded me how much each one will sink after it rains a few times. Rather than raise the stones, we dug out the space in front of them to clear a view behind them. This area was already greatly affected by the dripline of the previous bushes, as well as the fact that the original garden box was much deeper here. This also gave us a great opportunity to clear out weeds, which will make re-seeding go more smoothly when we get to that step. This is about the halfway point; we next began creating more of a downward slope away from the house, which gives us more room behind the brick, and a slight hill by the house.
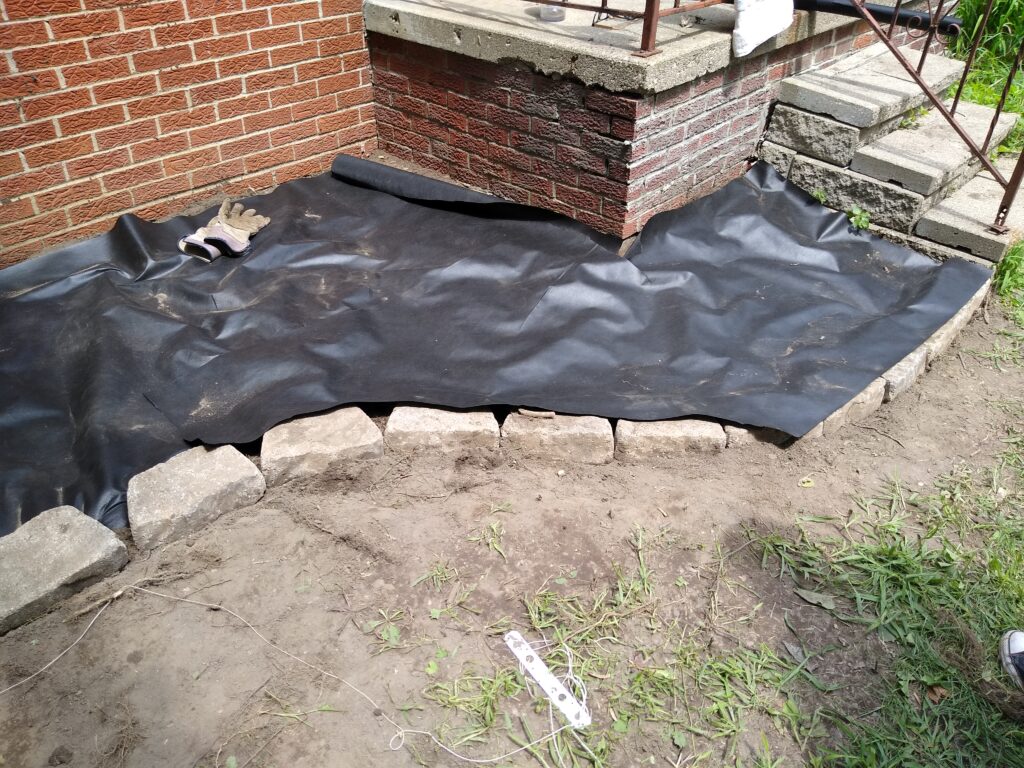

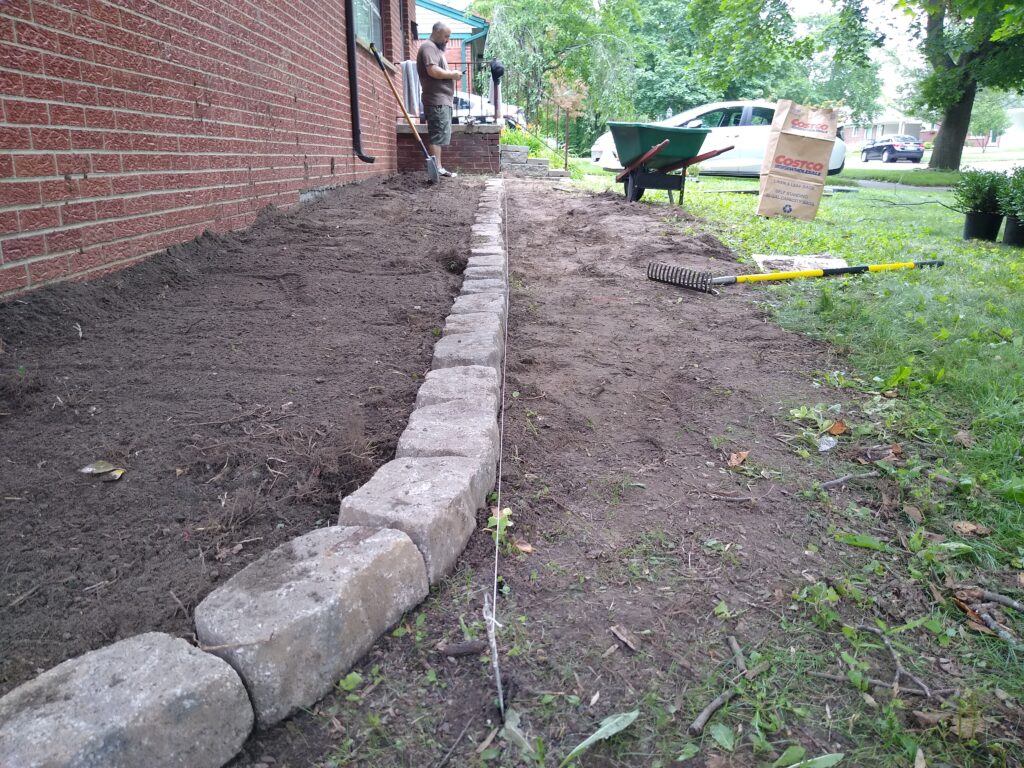
Next we laid down some weed blocker. We tucked this under the stones (you can just barely make out that the elevation is different here, otherwise we’d have a hard time burying the blocker), and trimmed the front along the curve. We also gave ourselves plenty of overlap (about a foot) so we can be sure nothing is coming up beneath it. Since I know we’ll be mulching after, I just wanted to give the mulch a nice place to sit and not slide around too much.
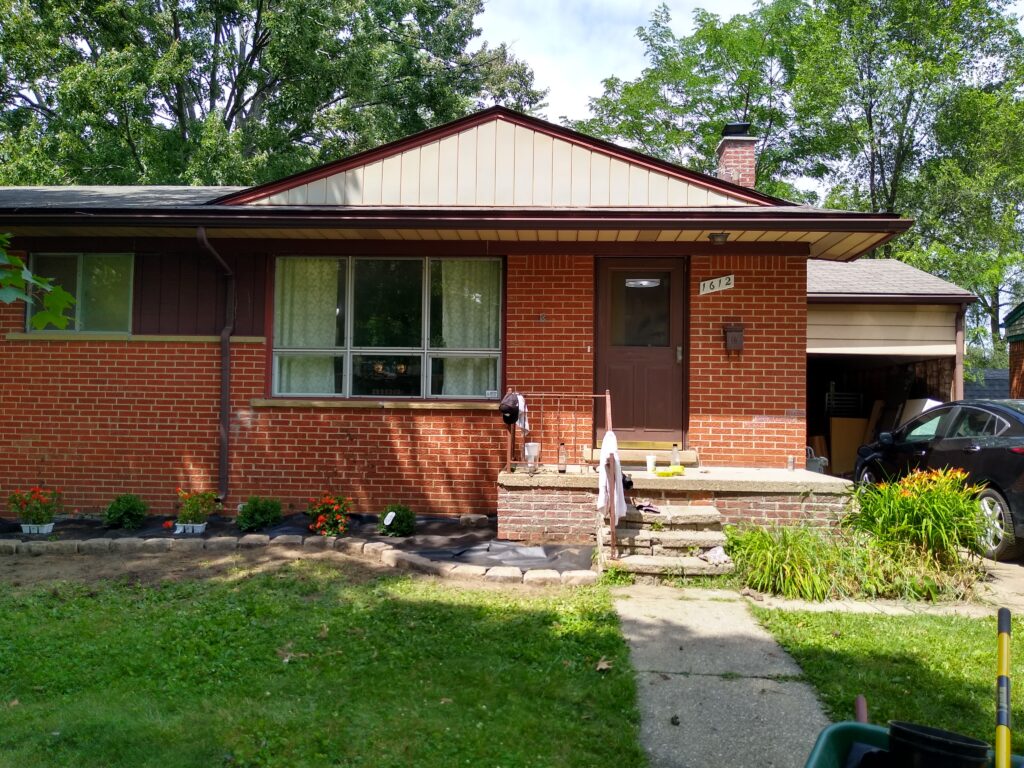
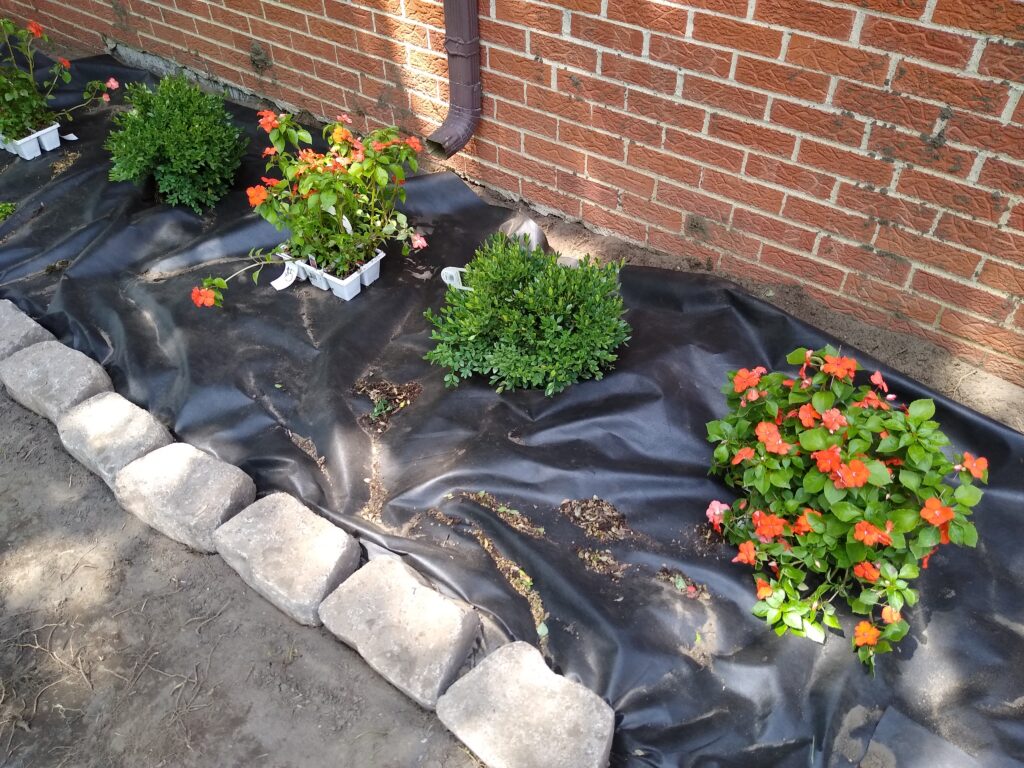
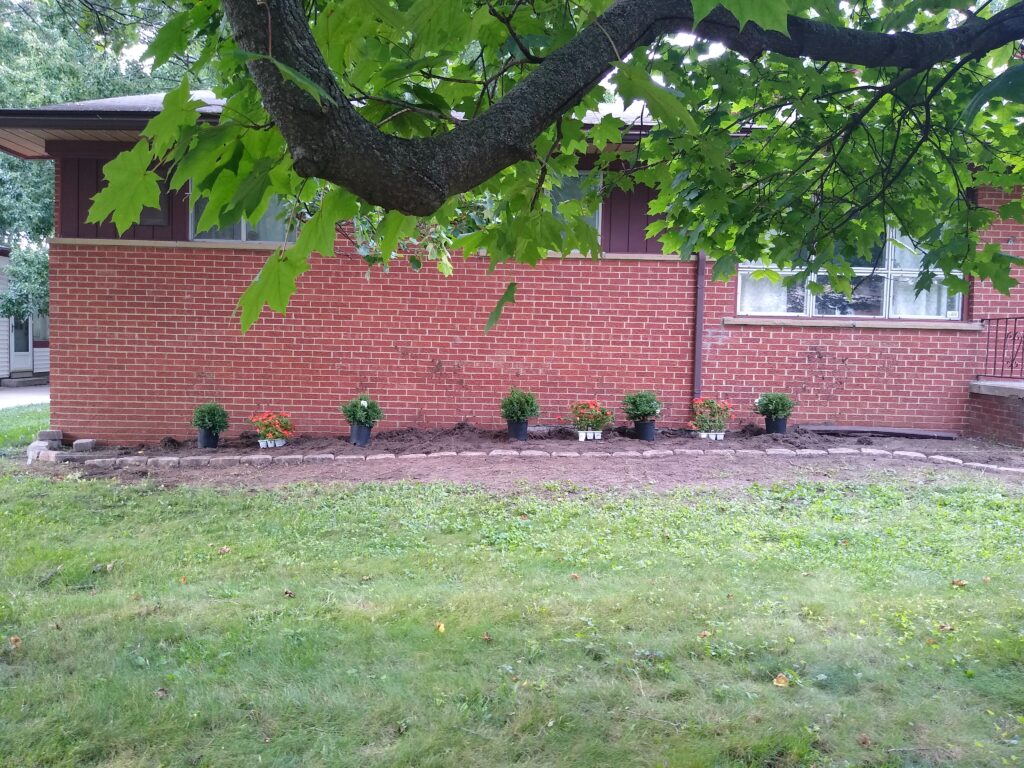
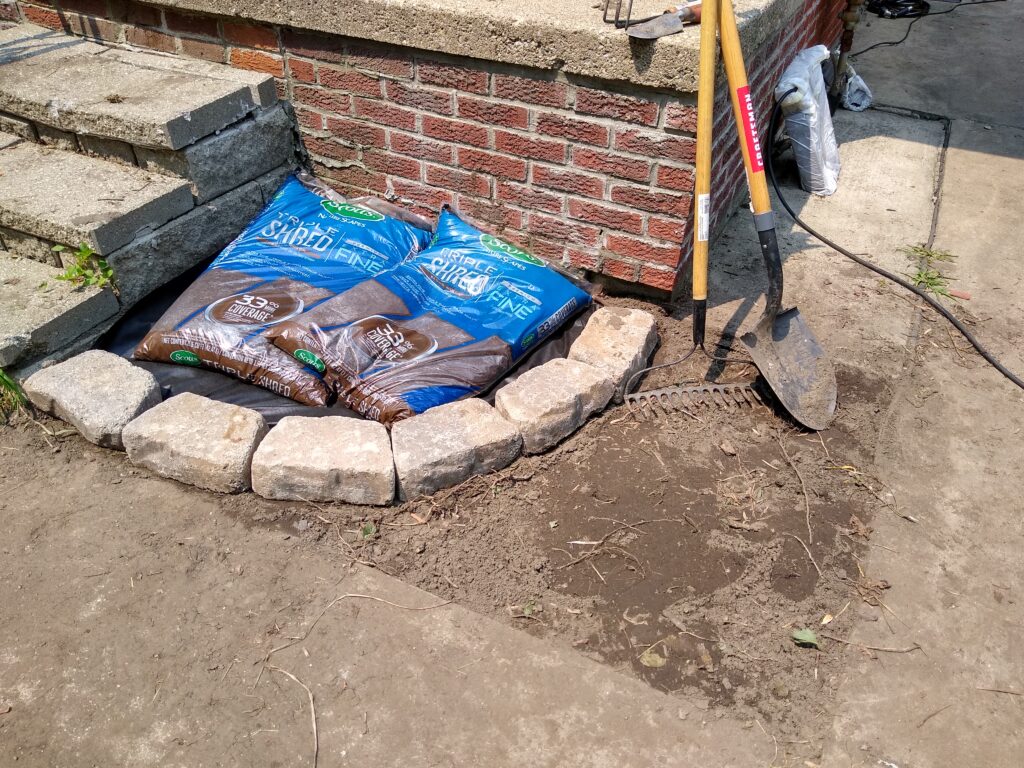
With the weed blocker down, we started to measure/place the plants. 5′ spacing on the boxwoods, and the annuals will just get spread out in-between. We got 3 of the 6 boxwoods into the ground before we had to break for the day. Also, at this point Josh volunteered to come out another day and continue this process for the other side of the stairs. I wanted to work on this too, but there’s a lot more going on with that box – some active daylilies, some very active weeds with 1.5″ thick roots, some uneven cement. Plus, if we’re changing the shape of the box, the cement won’t match, so… no clue how that will get fixed, but Josh said cement is easy, so I’m going with it.
I needed to buy a few more boxwoods – one for each side of the stairs – and a couple more flats of the annuals. But if the work on the left of the stairs is any indication, mirroring this on the opposite side is going to make my house look like a million bucks, and I’m just thrilled for the refreshing look!
Day 4 - "The Other Side"
Fast forward to Saturday – we removed everything from the right side of the porch, right down to the dirt. So much cleaner now!
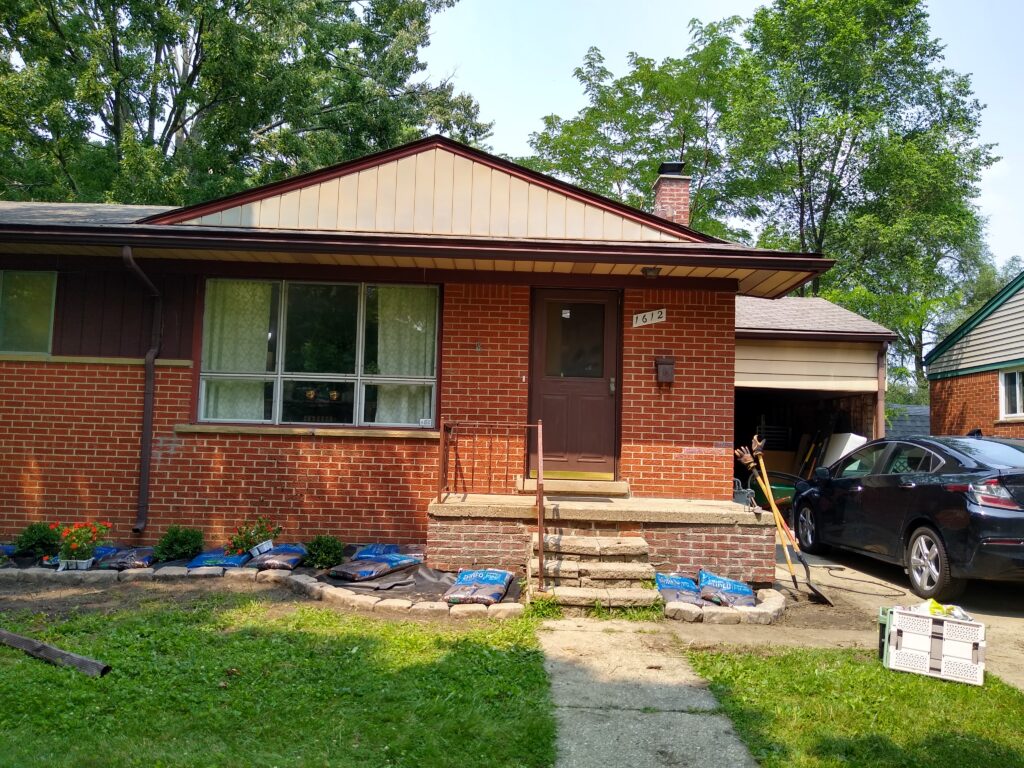
Day 5 - Planting & Mulching
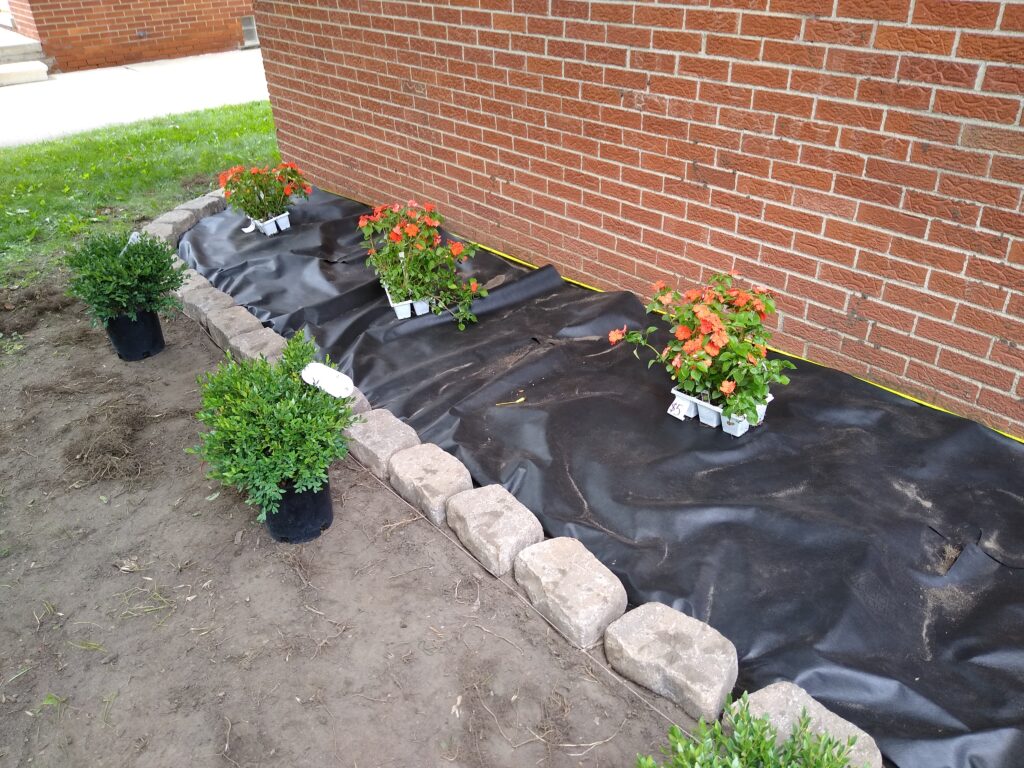
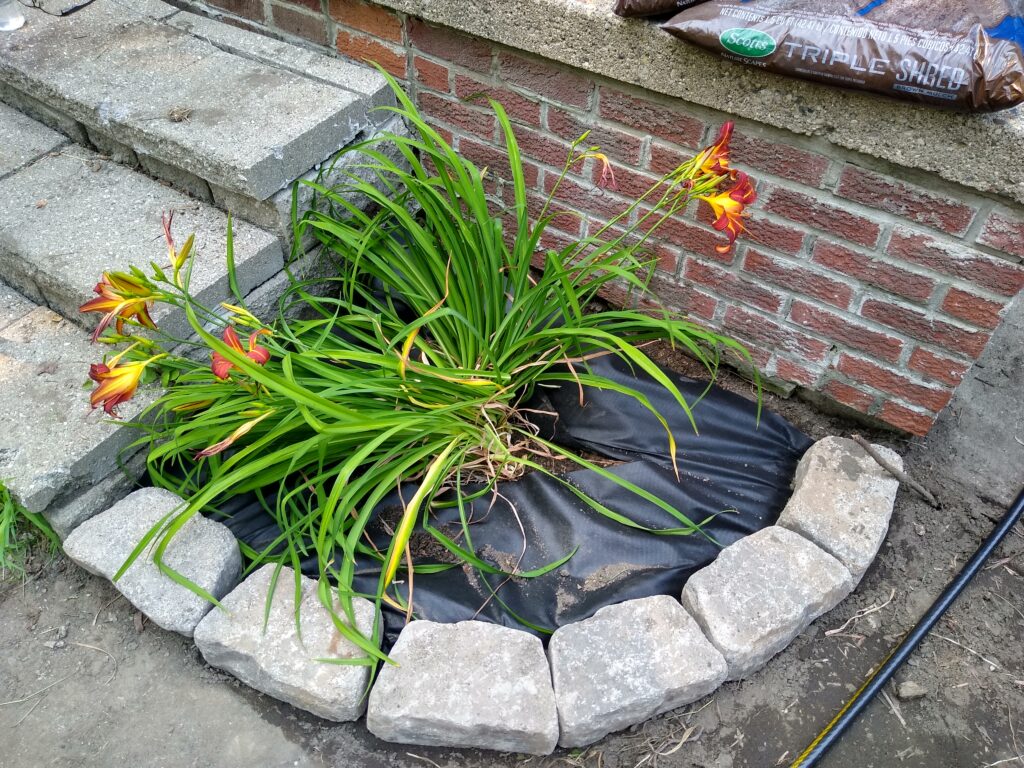
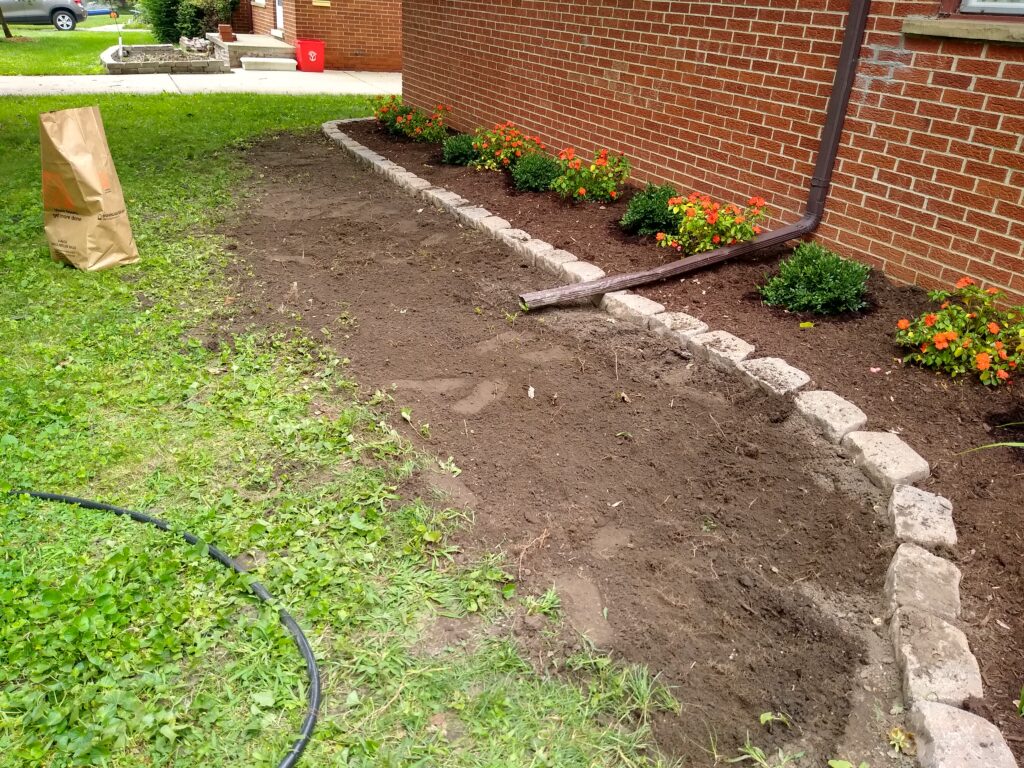
I bought a few more stones, set down another strip of weed blocker, and got it (and the opposite side) ready for mulch.
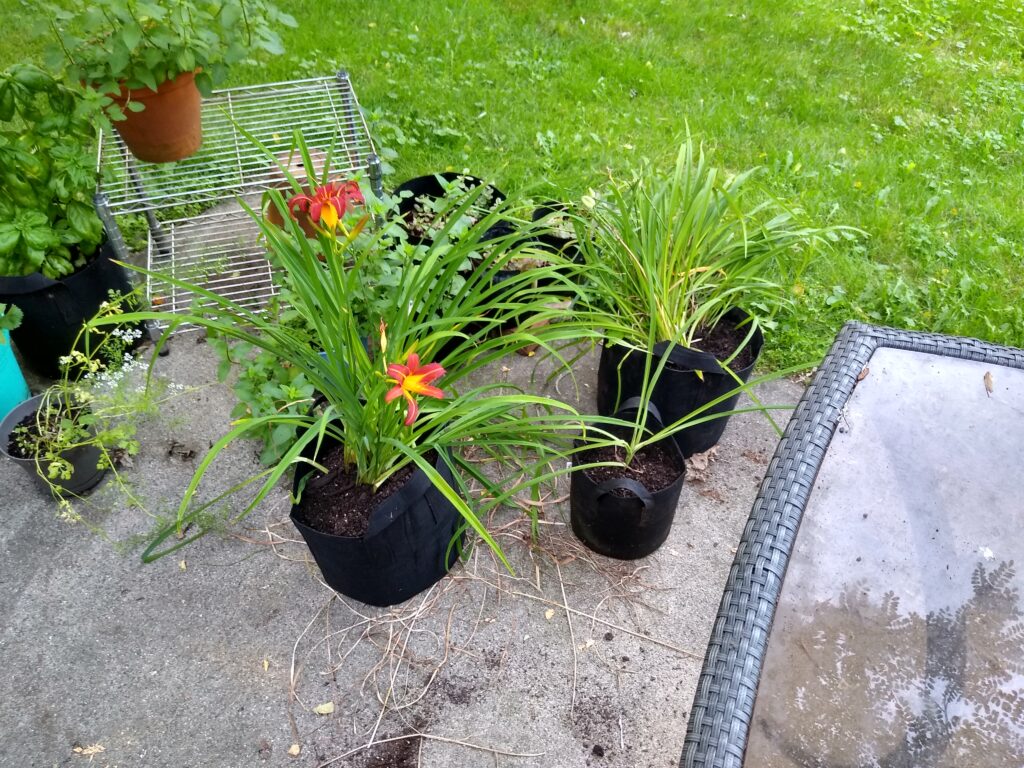
And look! I was able to save quite a few daylilies!
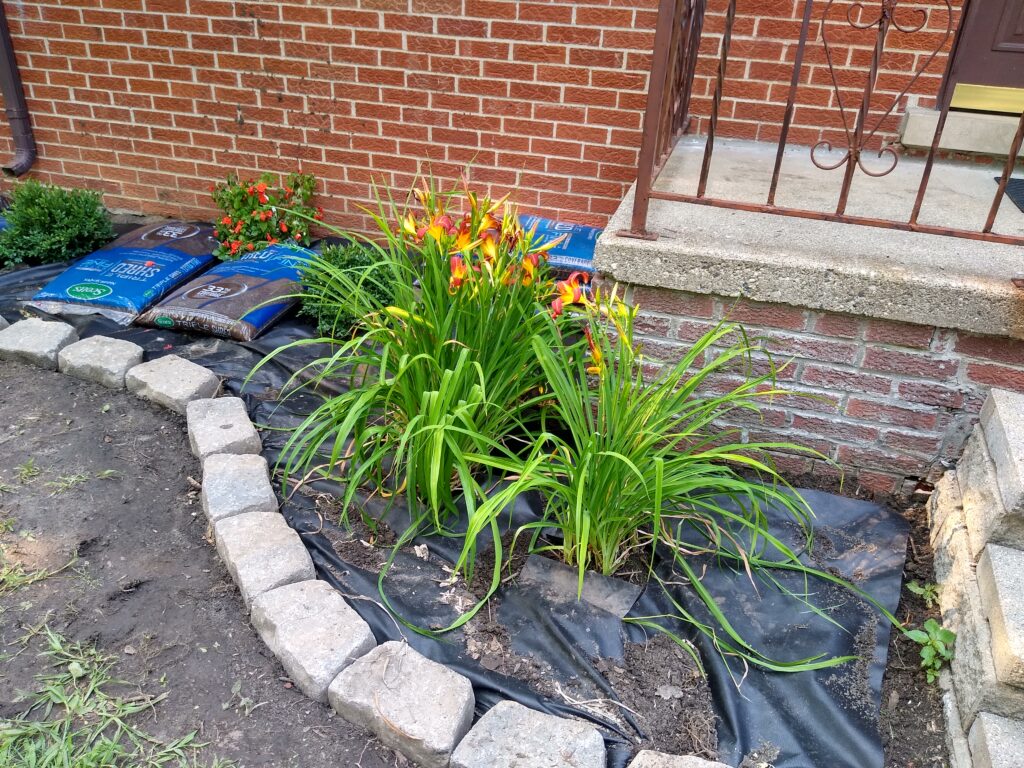
I got everything planted, and placed the annuals directly into the mulch – planters and all. This will be easy to remove at the end of the season, and next spring either I (or the new owner) can plant something, throw in new annuals – whatever.
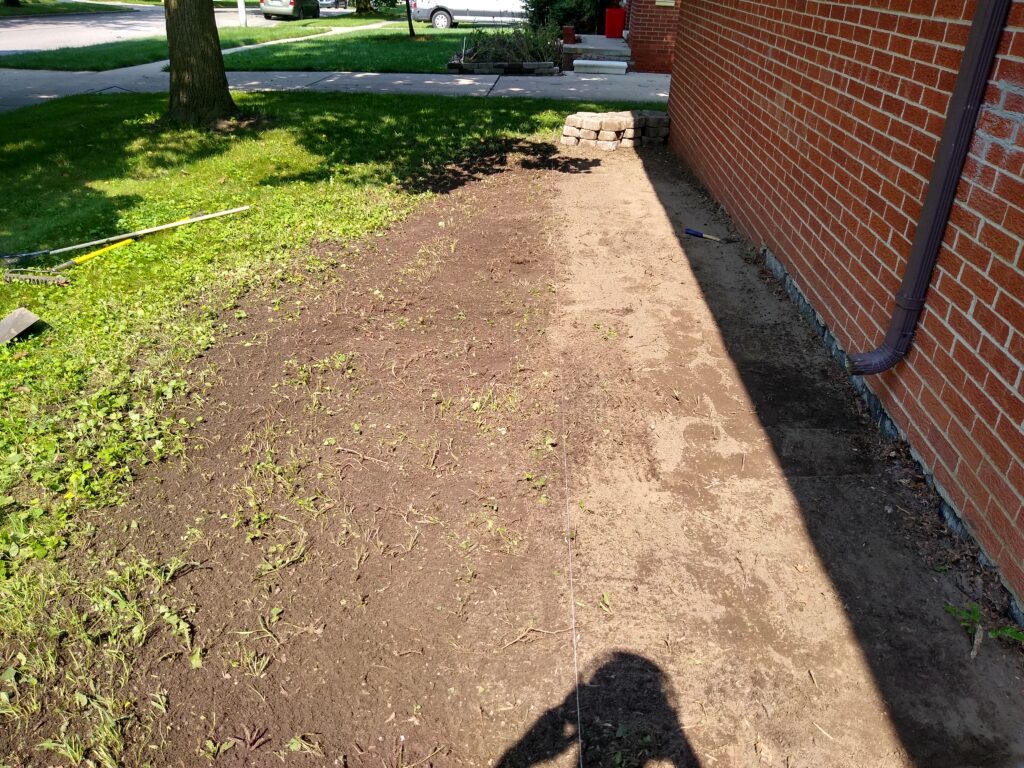
Day 6 - Regrading the Lawn
There was still a TON of dirt in front of the stones. Since I was planning to reseed this all anyways, I might as well pull out the dirt, pull out any roots I can find, and have a clean slate for my new lawn.

It’s hard to see from the photos, but I removed about a 6″ high chunk of dirt that was mounding around where the old garden bed used to be.
I’ve taken all the excess dirt from the front, and have placed it in my backyard. I have an old tree with a ton of exposed roots, and it’s hard for the grass to grow properly back there. Again, since I’m reseeding anyways, might as well pile the dirt up and relevel it before I begin.
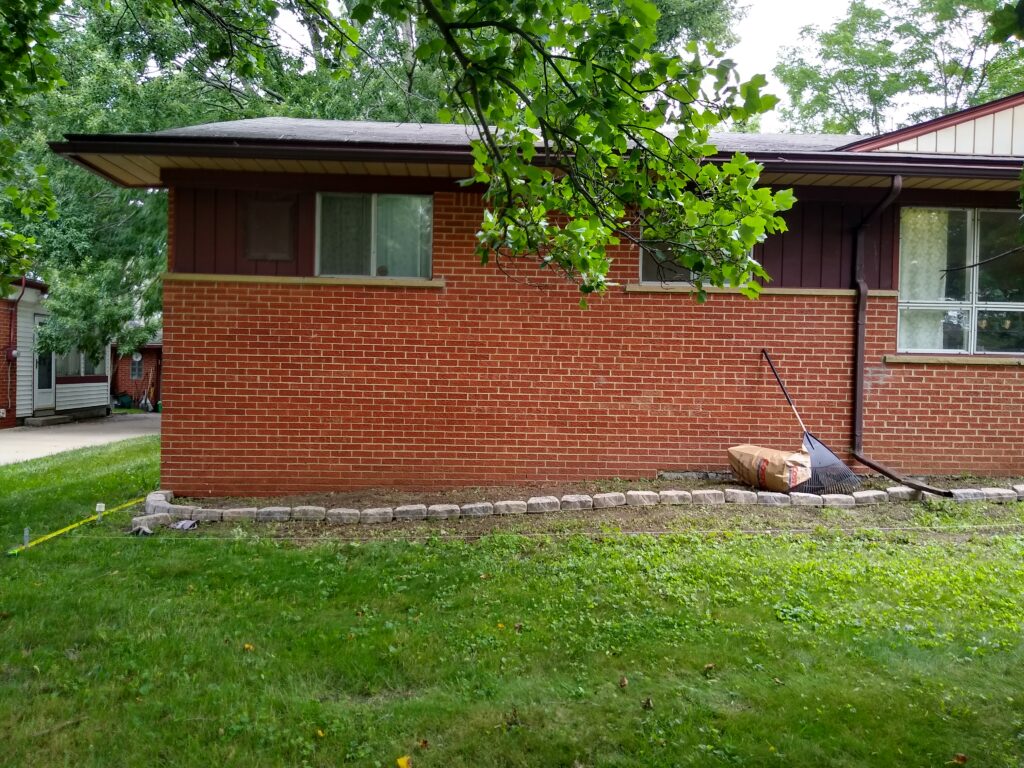
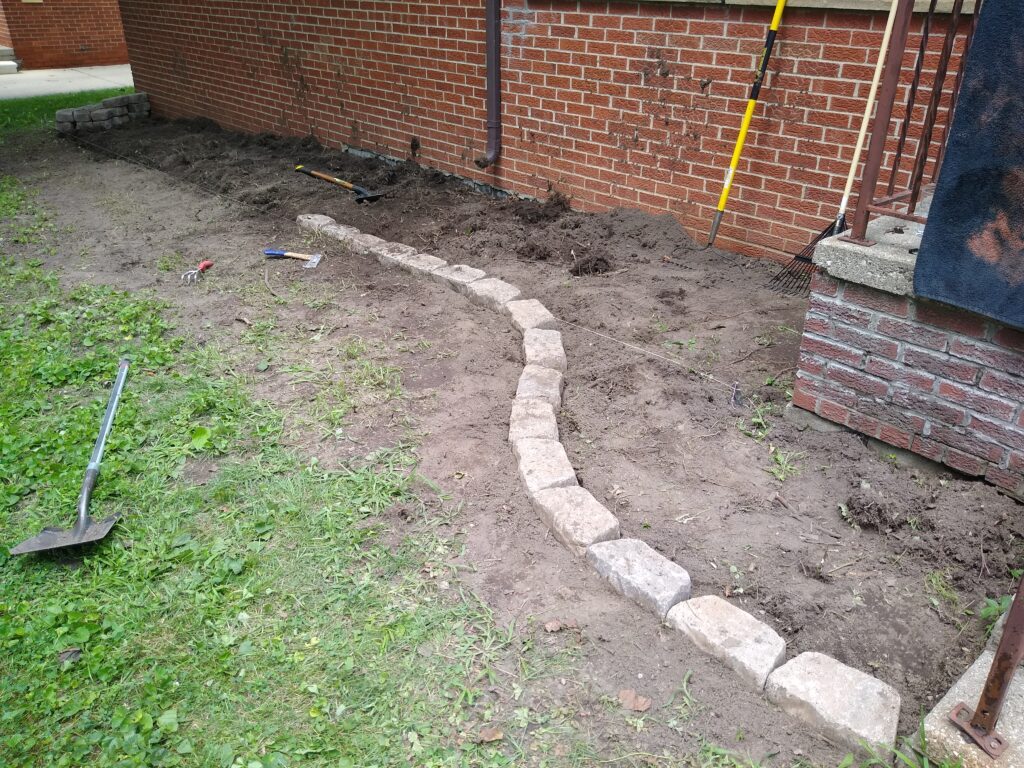
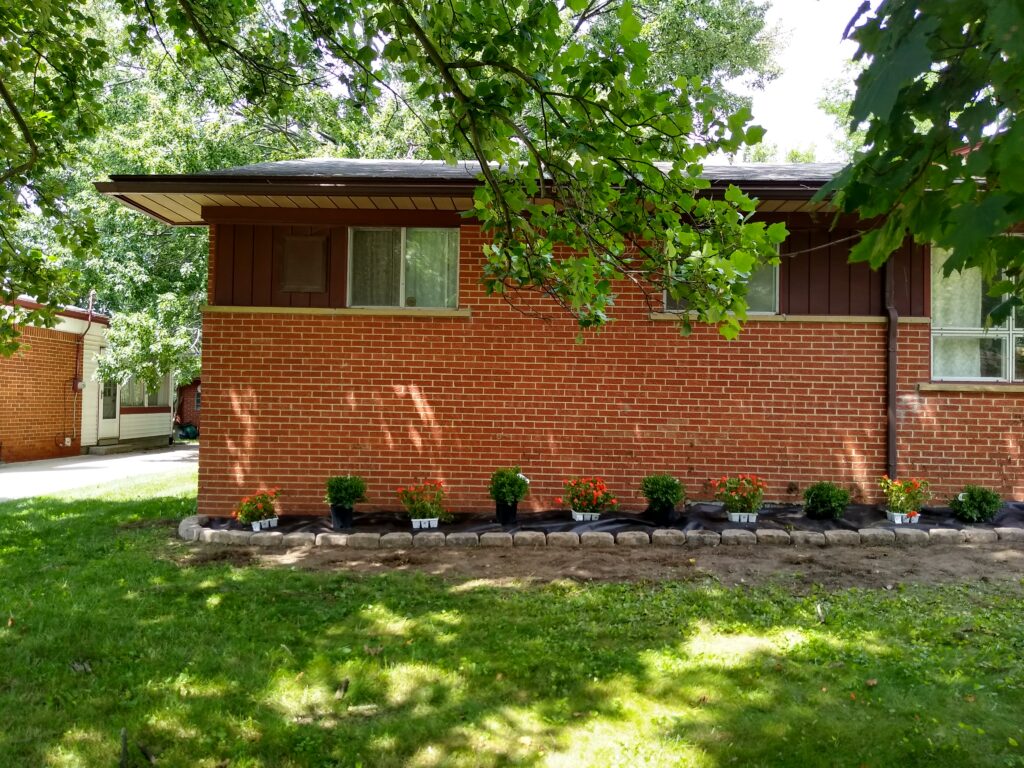
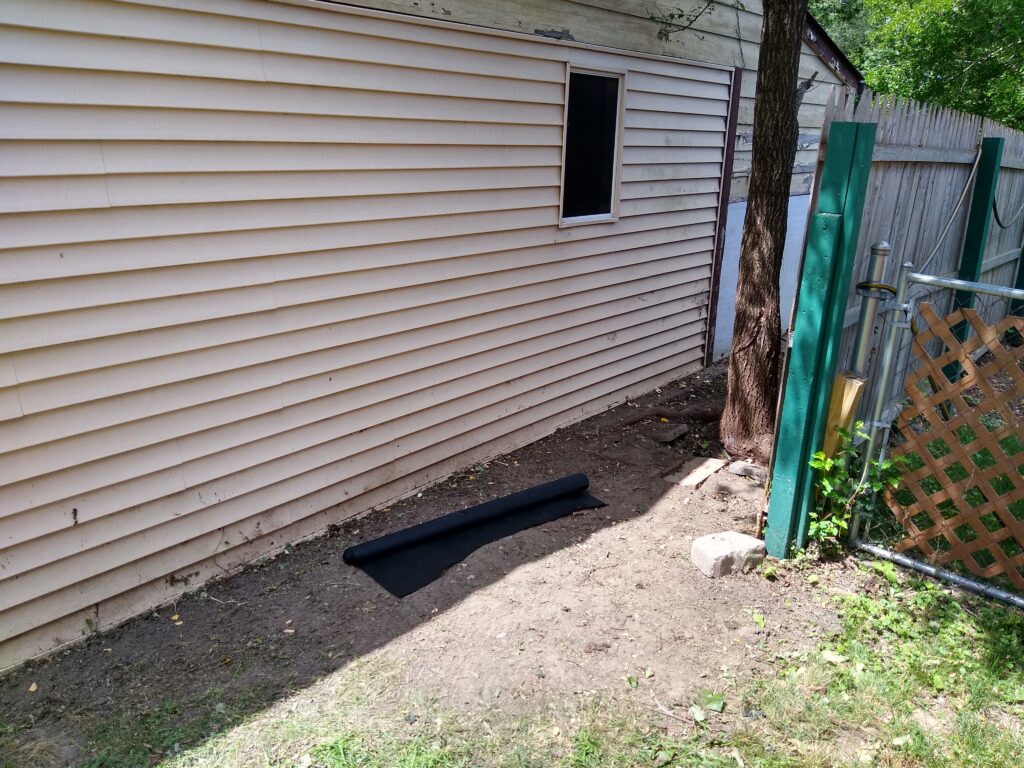
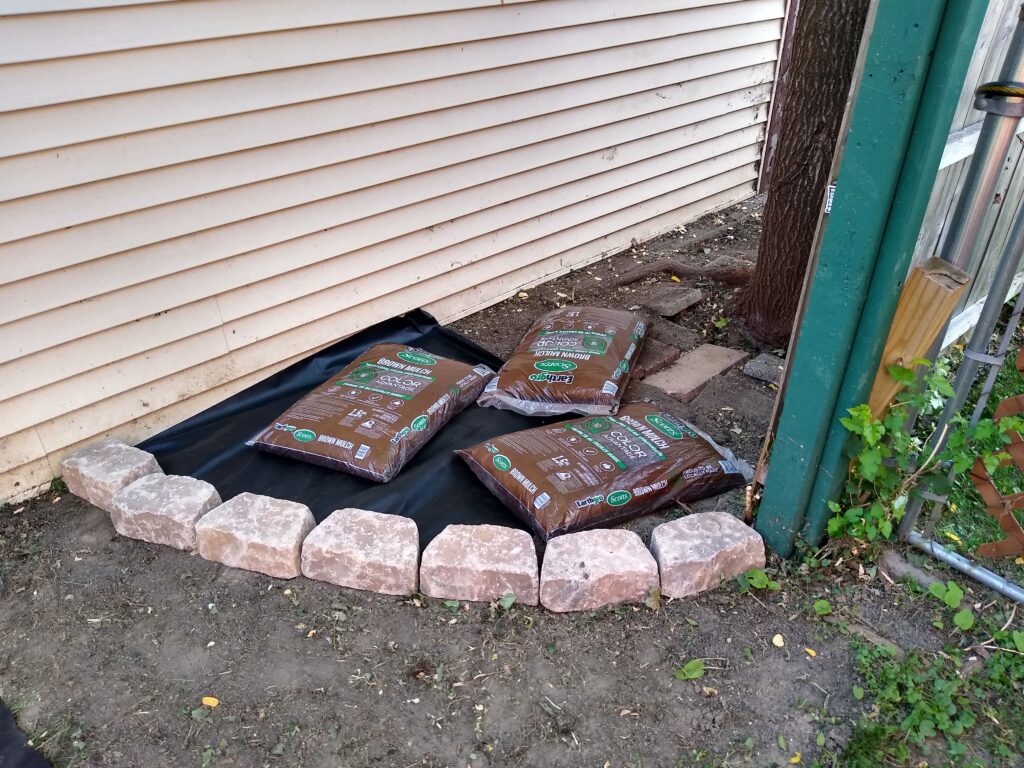
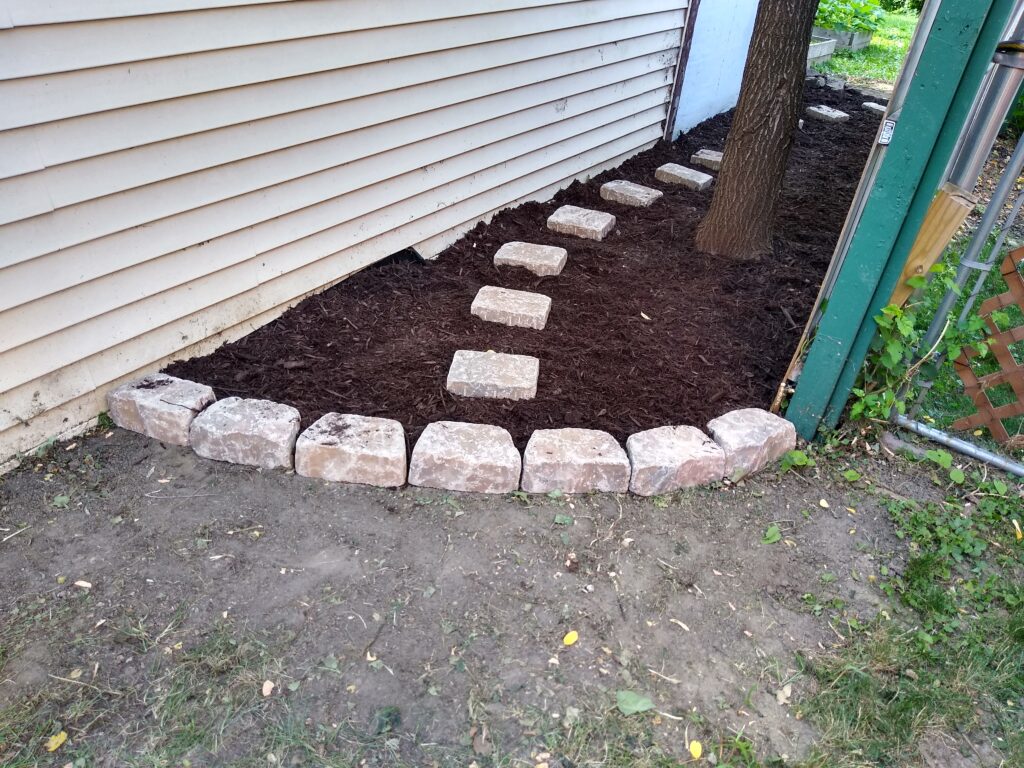
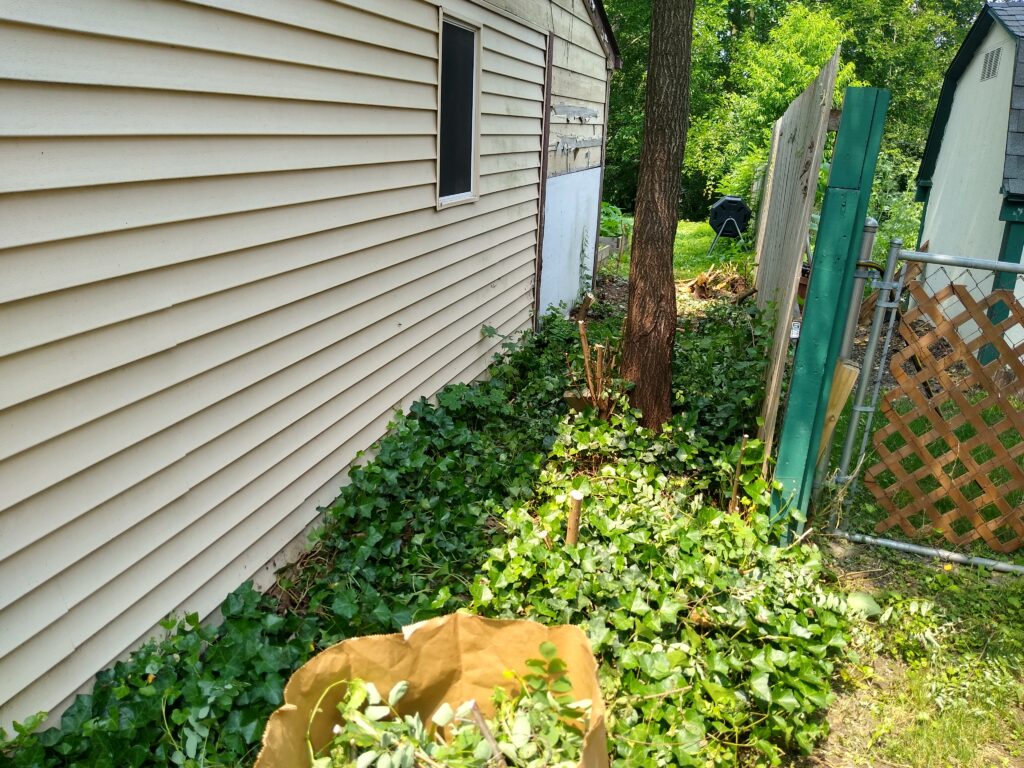
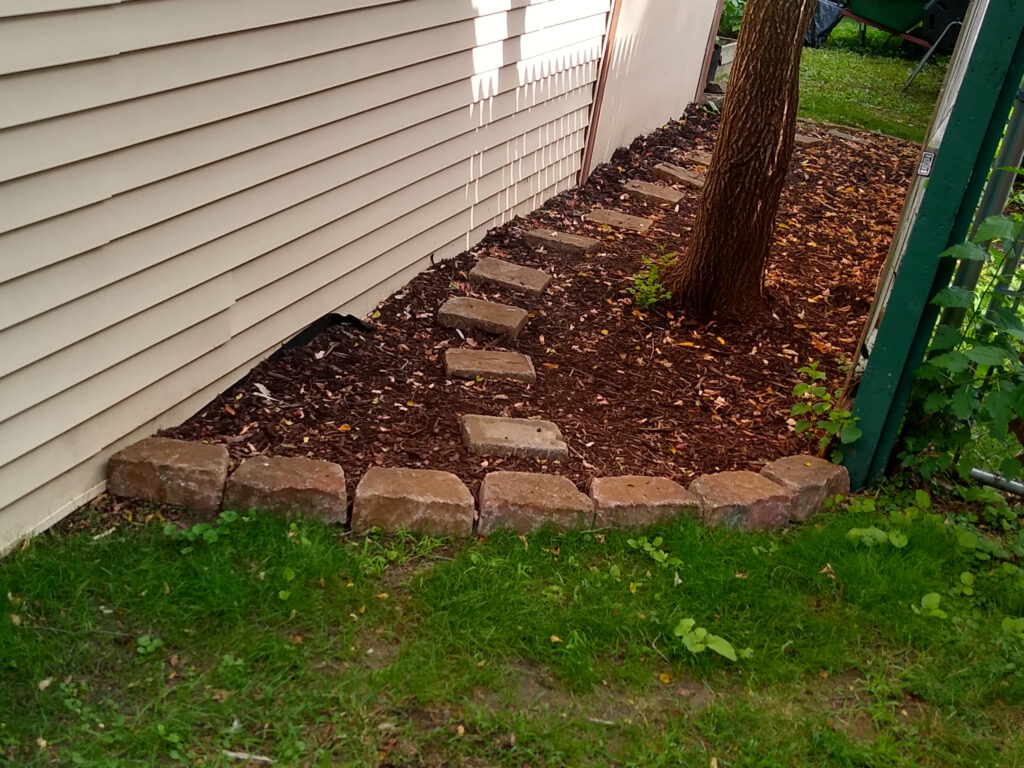
Side Quest - Side of the house.
I’ve got quite the mess of weeds, ivy, and “weed trees” that keep popping up. After seeing how quickly the front of the house went, I decided this would be a piece of cake, so I repeated the entire process on the side of the house.

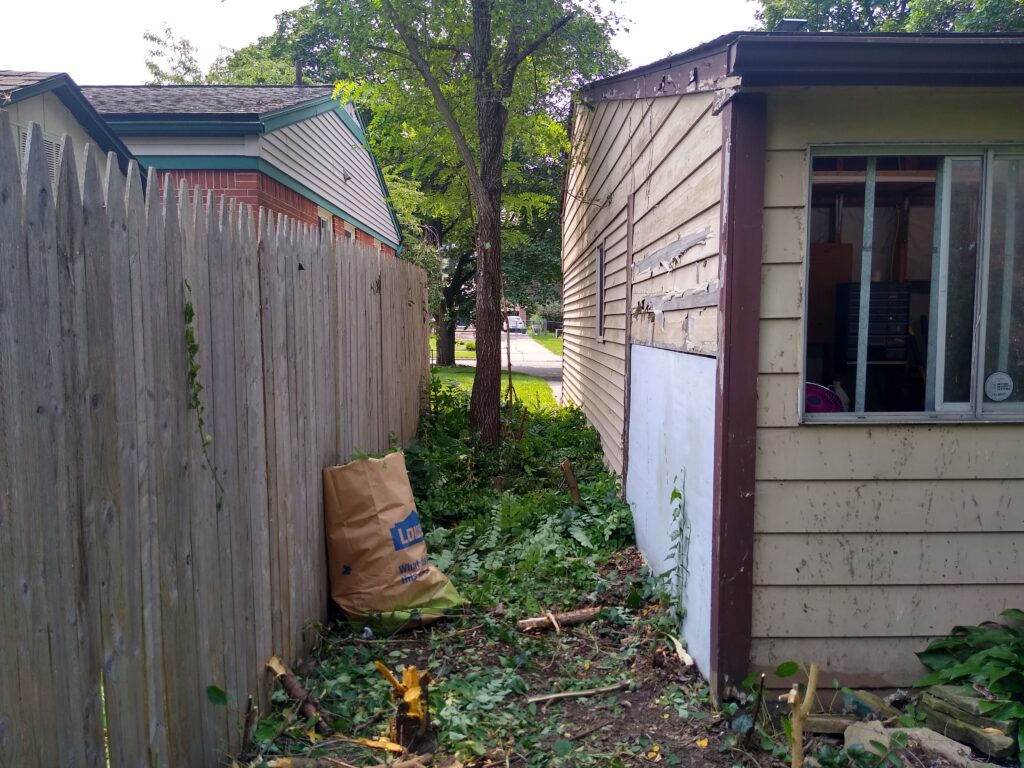
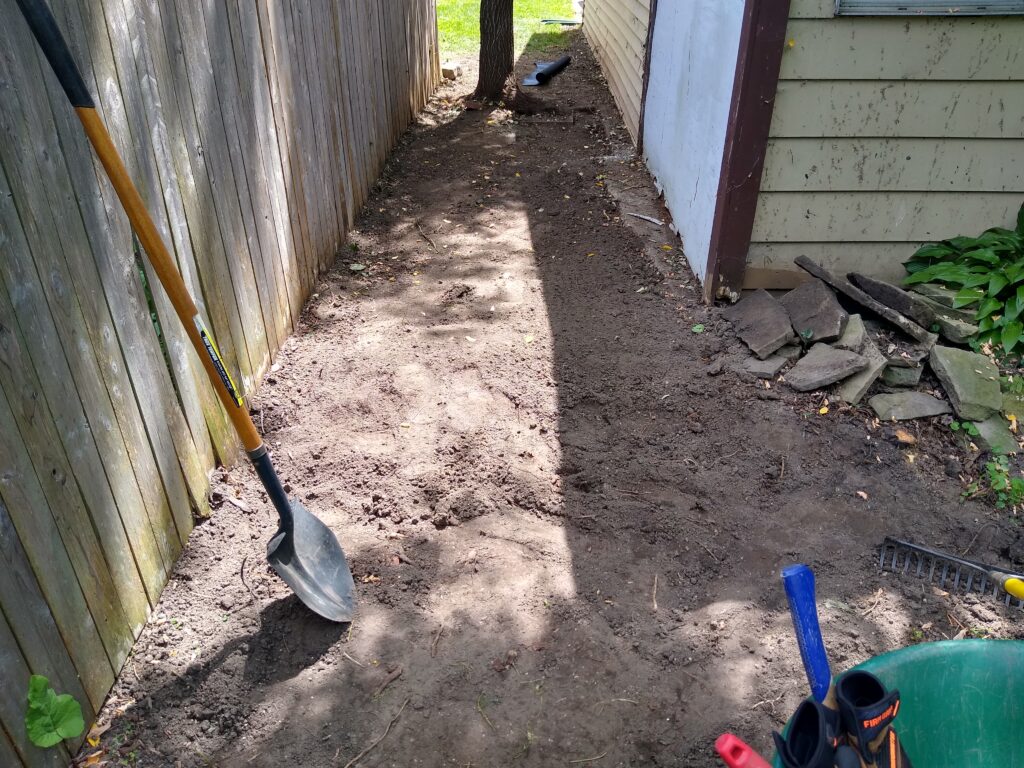
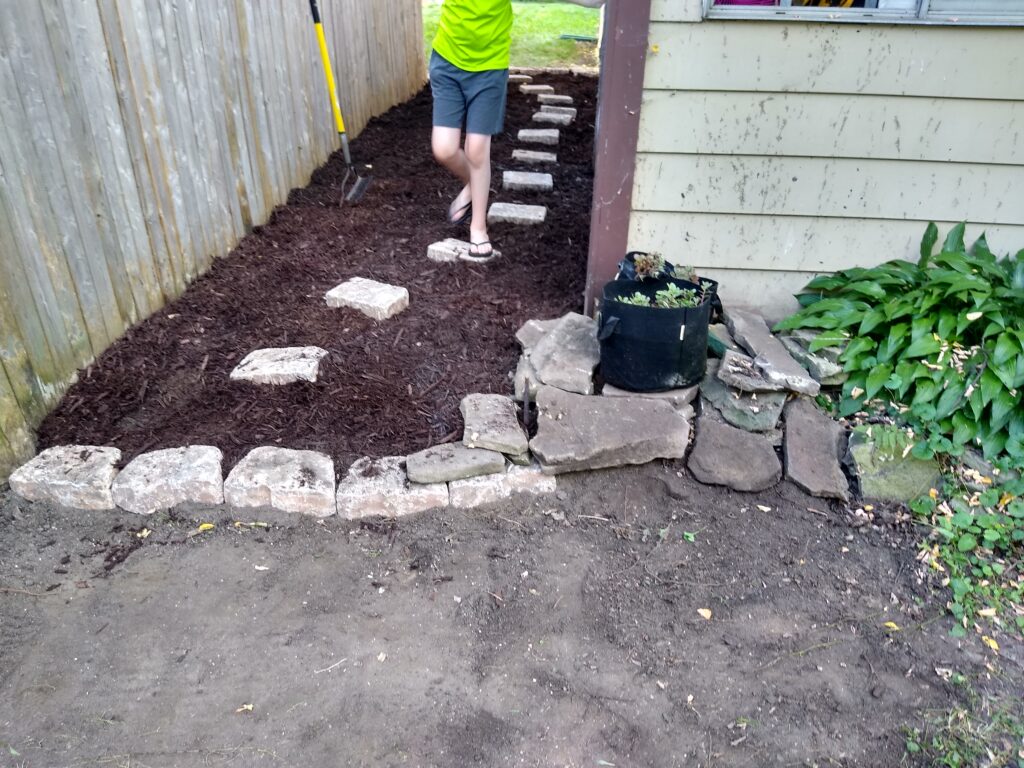
It’s not perfect, but at least I won’t have any new hazards popping up. The rounded bricks in the front mimic the shape on the front porch, and I have a very lazy “transition” between the retaining blocks and the slate bricks from the old collapsed garden bed in the back of the shed.
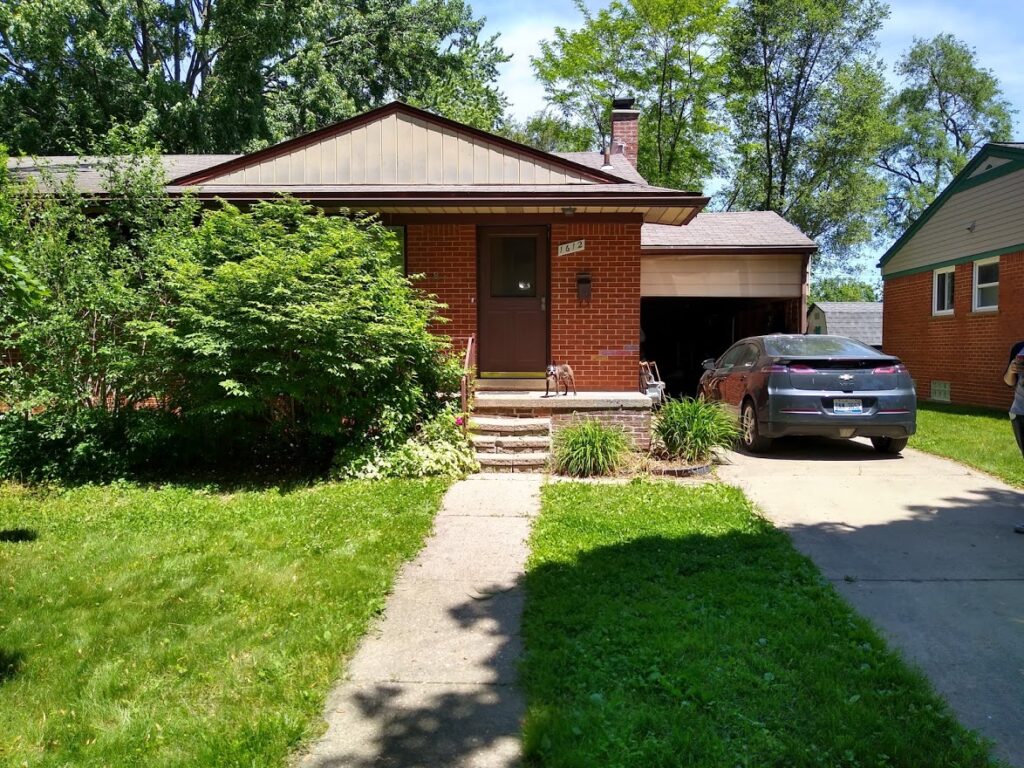
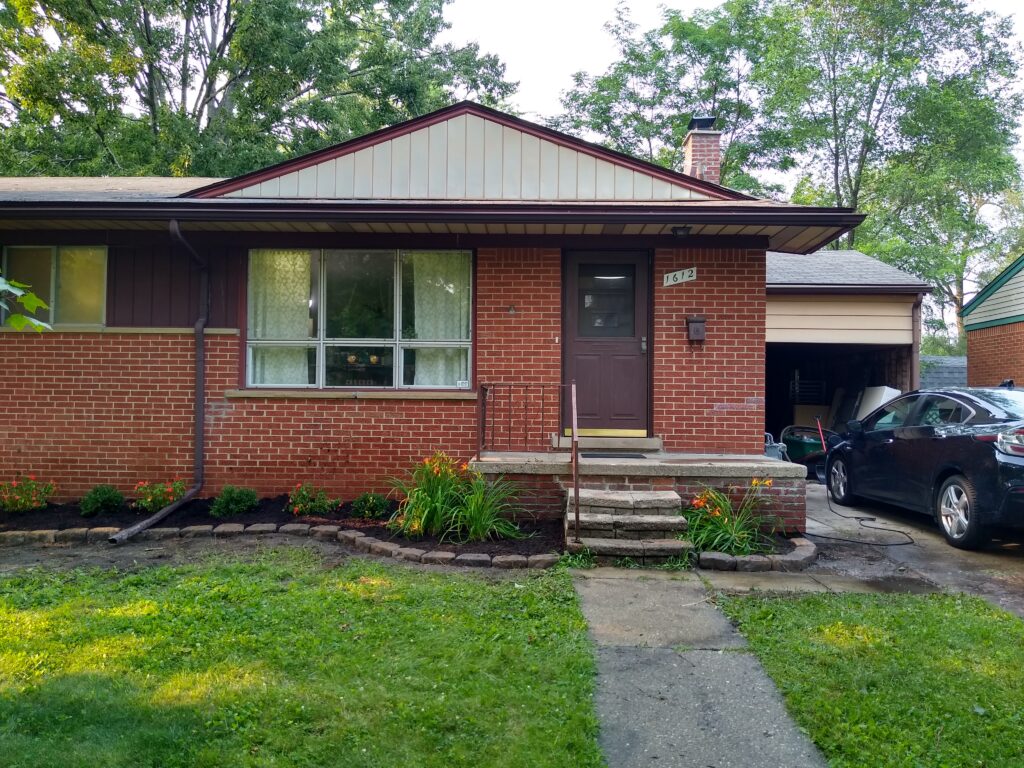
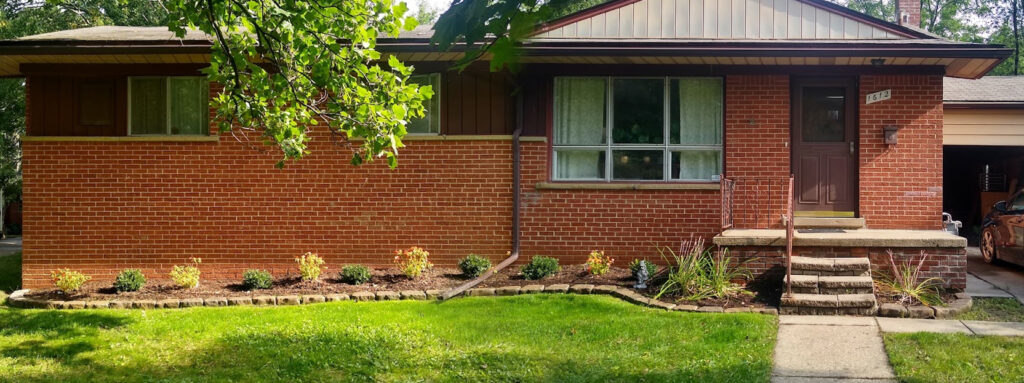
Final Reveal!
I seeded the grass, and then… I waited.
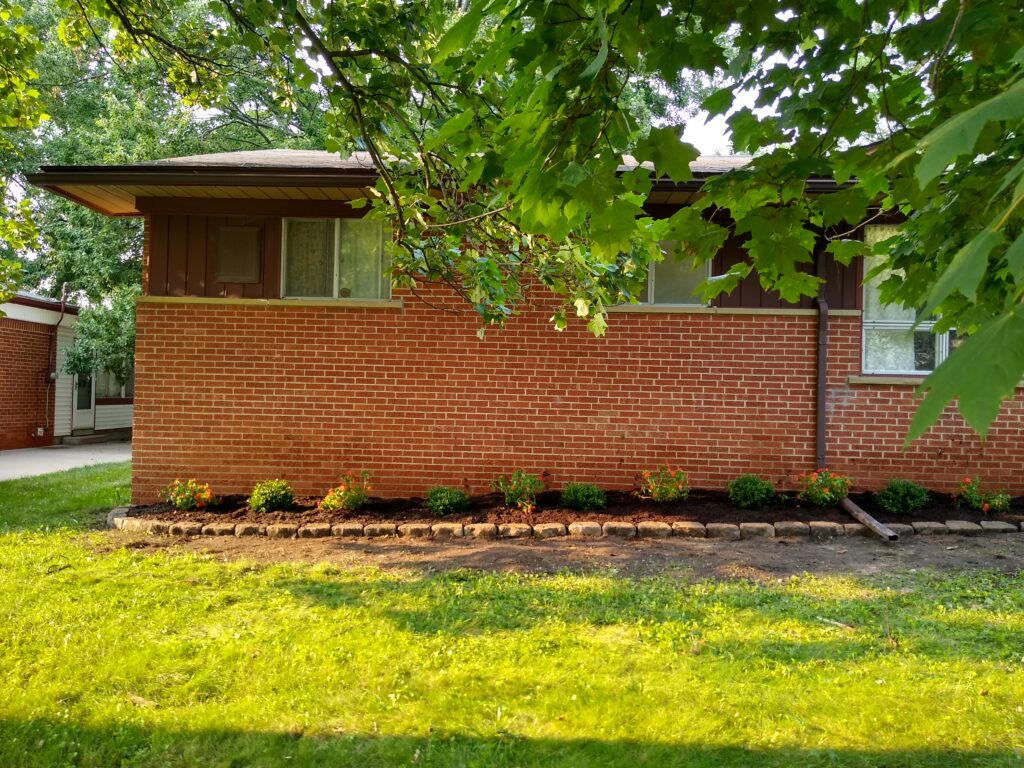
Boom! It’s like a whole new house! And remember that old tree in the backyard, with all the exposed roots I kept talking about? Well, feast your eyes on it now!
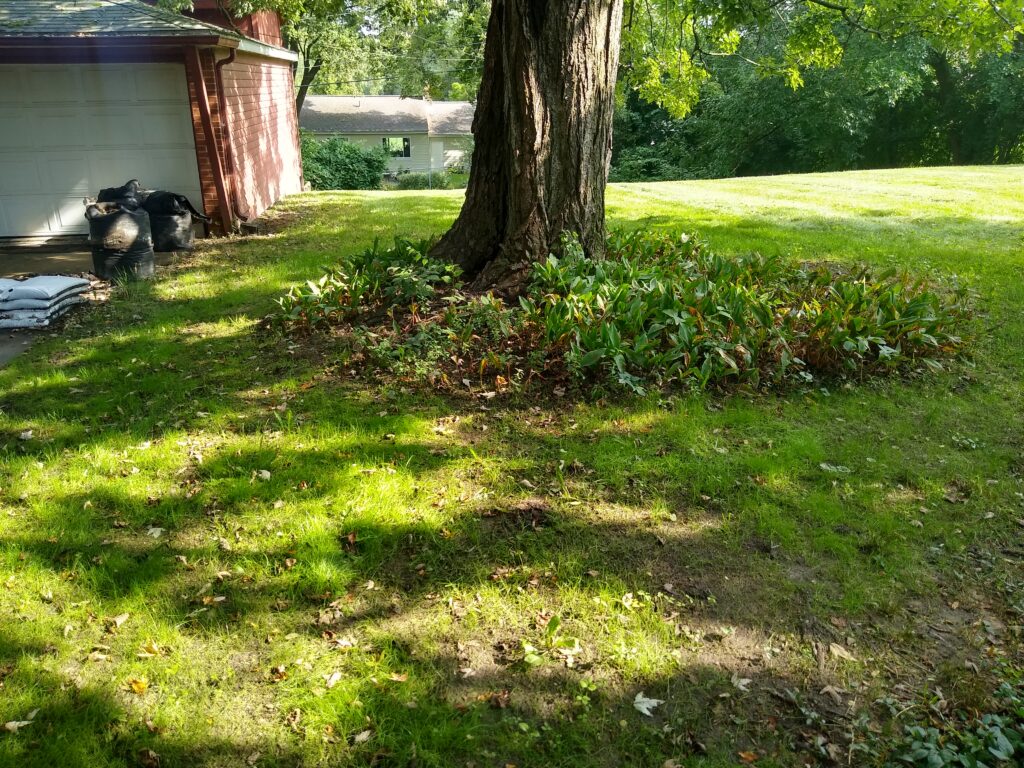
There’s still some patchy bits, but before I started there were roots that were sticking up 4″ from the ground. Now I’ve got grass all the way up to the tree itself, and there’s a more clear transition between the yard and then Hostas that surround it.
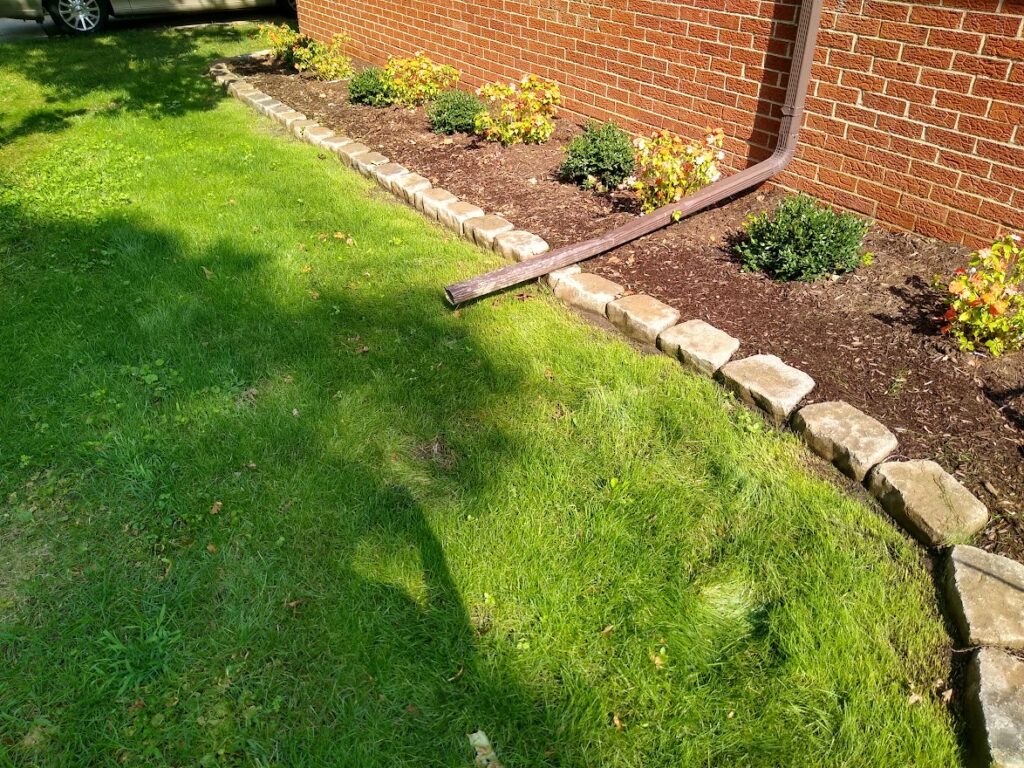
Some more before-and-after’s…
In the end, this took a LOT of work – work I didn’t know how to do, and that I’d been putting off for almost a decade. But, after deciding that it was something I could complete (and put in the work…), everything just sort of worked out. My house looks better, I feel better about it, and the entire process inspired me to take on other projects around the house.
To be continued…